Exploring the world around us is one of the main activities in early childhood and it’s crucial for this development stage! Touching and putting almost everything in the mouth is nerve-wracking for all parents, but very necessary for a child’s sensory development. There is a solution – provide materials, like sensory play colors, which are both fun to play with and safe to eat
Article Contents
1. What Is Sensory Development And Why Is It Important?2. Materials Needed For The Sensory Play Colors Activity
3. Instructions On Making The Sensory Play Colors
4. What Will You Develop And Learn Making Sensory Colors?
Sensory play activities are awesome because they help children develop their senses and motor skills. They also provide an opportunity for children to interact with different textures and discover new things.
In this post, we’ll show you how to make sensory play colors. Making sensory play colors is a simple activity that helps kids develop their sense of touch. This activity requires only basic supplies such as flour, a pot, and food coloring.
This activity is perfect for toddlers who are just starting to explore the world around them.
What Is Sensory Development And Why Is It Important?
Sensory integration is a joint collaboration of all our senses that results in our perception – the way we experience the world around us.
Humans learn and experience the world with their senses. There are 7 of them: sight, smell, taste, touch, hearing, proprioception (body position), and movement.
We receive different sensory inputs all the time but how we interpret them depends on perception – the way the brain processes the inputs and decides on the proper action. Every time we experience certain input, the brain develops and strengthens neural pathways which help us to understand and react to familiar experiences.
As you can imagine, sensory experiences are especially important in early childhood. The best way adults can help a child’s development in this stage is to provide a safe environment for exploration and discovery.

The child needs to touch different textures, look at engaging visual stimuli, listen to different sounds, roll over, try to stand up, and fall. Those are all valuable experiences that promote learning and development.
So next time you see your child licking something, remember he or she just learned something new! 🙂
Materials Needed For The Sensory Play Colors Activity

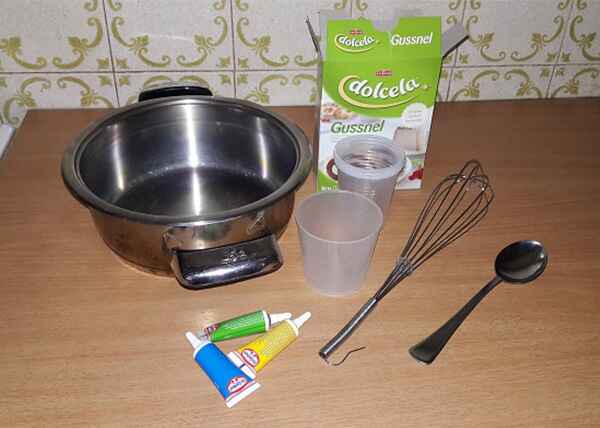
- Measuring Cup. A measuring cup is not mandatory, but it would be good to have one at hand for easier measuring and adding correct ratios.
- Corn Starch, or Corn Flour. We will need 2 cups of Corn Starch. We can buy it in almost any grocery store that sells flour so it should be easy to acquire.
- Food colors. Since we will be doing some art, we need colors. Food colors are the best, especially if small children will explore the activity. For older children, we can even use acrylic paints or tempera paints.
- 1 cup of cold water. The regular temperature from the pipe is ok. We don’t need to cool water in the refrigerator.
- 4 cups of hot water. We should boil the water so it is close to 100 degrees celsius.
- Cooking Pot. We will need to heat our mixture a bit more so we will need some pot that can be used for cooking.
- Stove. As mentioned above, we will need a stove for additional heating of our mixture.
- Whisk. We will also need to mix while heating and the whisk will do the job the best.
- Jars or glasses. In the end, we will need to split and color our mixture with different colors. So we will need a couple of jars or other containers to store them. The number of containers depends on how many colors you plan to create.
Instructions On Making The Sensory Play Colors
Watch the video at the beginning of the article for step-by-step instructions in video format, or continue reading for detailed, written instructions.
1. Add 2 cups of cornstarch into the cooking pot. Using our measuring cup, we can easily measure 2 cups of cornstarch. We can put cornstarch in the cooking pot since it will soon need to be warmed on the stove.
2. Add 1 cup of water into the cooking pot. Now pour 1 cup of water over the cornstarch in the cooking pot. Regular temperature (or cold) water will be good for this step.
3. Mix the Cornstarch and Water for 2 minutes. Take a whisk or any other kitchen utensil and vigorously mix cornstarch and water in the pot for a minute or two. You will know it’s enough when cornstarch dissolves in water.
4. Add 4 cups of boiling water into the cooking pot. Heat 4 cups of water close to boiling state (100 degrees celsius).
5. Mix the cornstarch and water for 1 minute between each cup. Add 1 cup of hot water and mix everything for 1 minute. Then add the second cup of hot water and mix everything for 1 more minute. Continue until you add 4 cups of boiling water.
6. Put the pot on the light fire and continue mixing. We will need a stove and a light fire. Put the pot on the stove and mix until you get desired density. 2 minutes of mixing should be enough.
6.1. If the mixture is not thick enough, add some more cornstarch. If you would like to make it more liquid, add more hot water. We used 2 cups of cornstarch and 4.5 cups of boiled water, and the paint was quite thick. It looked great on paper and felt mushy and pliable. When it got cold, it became more rubbery, and better for modeling than painting. So if you want to get liquid color, add a few more cups of water!
7. Split the mixture in equal parts into jars or containers. After getting the desired density, we should split the mixture into equal parts. The number of parts depends on how many colors you have. If you have, for example, 4 colors, you will split the mixture into 4 equal parts.
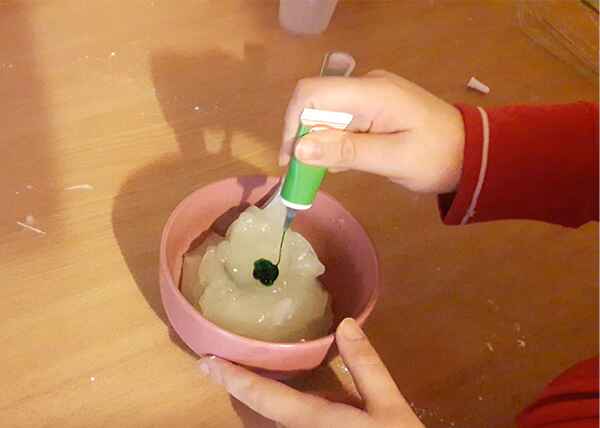
8. Add color to each container. After splitting our mixture, we need to color it. Add the food color (or acrylic colors) into the jar and mix all contents until the color is split evenly. Repeat until you color every mixture.

9. Start the artistic expression. We can use any surface that we are okay with getting dirty. Even paper can be a good surface to express ourselves with sensory play colors. Give colors to the child and let it explore more sensations at once.
What Will You Develop And Learn Making Sensory Colors?
- Explore different textures. Sensory colors range from liquid to rubbery textures. Also, using them on different surfaces will allow children to explore different textures through the sense of touch.
- Creativity and expression. Sensory colors are excellent for free expression. There are no rules on how to use them so creativity will be maximized.
- Fine motor skills. Using different colors we prepared and putting them on our surface will develop fine motor skills in children.
- Oculomotor coordination. Just like with fine motor skills, the child will develop hand-eye coordination while coordinating movements with the idea of the art project.
We hope you enjoyed making and using sensory play colors. And if you liked this activity and would like to try something similar, we have some great recommendations.
- You can see How to make homemade playdough and make your own playdough whenever you want!
- Also, check out How to teach your child about colors. With this activity, you can learn about color while doing a fun activity and see how colors mix together.
- Also, you can try making Rainbow colored rice to learn about colors and for another excellent sensory play activity.
- 2 more great sensory activities for the babies that we definitely recommend are Homemade sensory bottle for child sensory development and How to make sensory bag for child sensorimotor development.
- And for more information on child development, and what each stage brings, check out our article about Cognitive Development.
Happy playing and learning!
If you’re searching for some great STEM Activities for Kids and Child development tips, you’re in the right place! Check the Categories below to find the right activity for you.

STEM Science
Videos, guides and explanations about STEM Science in a step-by-step way with materials you probably already have at your home. Find new Science ideas.
Read more
STEM Technology
Videos, guides and explanations about STEM Technology in a step-by-step way with materials you probably already have at your home. Find new Technology ideas.
Read more
STEM Engineering
Videos, guides and explanations about STEM Engineering in a step-by-step way with materials you probably already have at your home. New Engineering ideas!
Read more
STEM Math
Videos, guides and explanations about STEM Math in a step-by-step way with materials you probably already have at your home. Find new Mathematics ideas.
Read more
Psychology
Find out all about development psychology topics that you always wanted to know. Here are articles from child psychology and development psychology overall.
Read more
First year of Child’s Life
Following a Child’s development every month from its birth. Personal experiences and tips on how to cope with challenges that you will face in parenting.
Read more
6 thoughts on “How to make Sensory Play Colors”