Another sensory activity? Yes! We really can’t overstate their importance in the child’s early development. They are amazing in stimulating the whole range of skills, not to mention fun. So let’s make a Sensory Board! There are tons of ways to make them and we will show you one, simple yet effective.
Article Contents
1. Why is sensory play so important?2. About Sensory board
3. Types of sensory boards
4. Materials needed for Sensory Board
5. Instructions on how to make Sensory Board
6. Positive effects of Sensory Board
Why is sensory play so important?
Sensory experiences are crucial for the proper development of babies and toddlers. Through touching, licking, squeezing and manipulating different textures, shapes and sizes they start to understand the properties and purpose of the things around them. It’s how they meet the world!
We already talked in depth about sensorimotor development in article Sensorimotor development and activities for Children. We recommend you read it if you want to know more.
But in short, Sensorimotor development is a process of learning about ourselves and our surrounding through our senses. We have 7 of them: sight, smell, hearing, touch, taste, balance (vestibular) and position in space (proprioception). Through processes of sensory processing and integration, they shape everything we experience.
As you are well aware, children have an innate curiosity and urge to explore. It’s our responsibility as a parent to provide a safe, but a stimulating environment in which they can. Contrary to many beliefs, for that, you don’t need any fancy “didactic” toys. Truth be told, almost any object is didactic in this age.
We can use Spoons for drumming, bowls for stacking. Containers are great to experiment putting stuff in and out and old socks are amazing puppets! That free form play is great for experimentation and learning about cause and effect. Little explorers will become familiar with many laws of physics in the process although they won’t even know they are “learning”. But that’s learning in its purest and most beautiful form. We already wrote about different types of sensorimotor activities so look there if you need more ideas.
About Sensory board
After making a sensory bottle and sensory bag, the time has come to give a try to the custom sensory board. This project can be as complex as you want it to be. You can go simple with cardboard and glue gun as we had, or if you are more “handy” and have tools, the sky is the limit.
Chains, wheels, cogs, zippers, anything goes. What is so great about sensory boards? They are appropriate for any age group, as we can modify materials we put on them. They can be more texture based, or offer more interactions, such as pulling, unzipping and turning. Because of that, they offer more types of sensory experiences, not just tactile and visual, but we can also include different sounds and smells. In this age group, cognitive and motor development go hand in hand. So this type of activity will help your child practice fine motor skills as well.
Types of sensory boards
As we already mentioned, there are no “rules” when you are making sensory boards. Of course, watch on safety of the materials – for example, can they be pulled out and will it be dangerous if they are. But other than that, you can put whatever you think will be interesting and appropriate for your child. But if you want to go more “thematic” here are some ideas.
- You can make a “nature” sensory board – put stuff such as leaves, tree bark, flowers, small stones, whatever you can find outside.
- You can make a “sea” theme – seashells, pouch with water, pictures or cloth-made sea creatures…
- Or “machine” theme. You get the picture.
- Another interesting idea, especially while learning colors, is to make color based sensory boards. For example, put different shapes, textures, pictures, but all in one color.
There are really lots of possibilities, just use your imagination and let your child’s interest guide you.
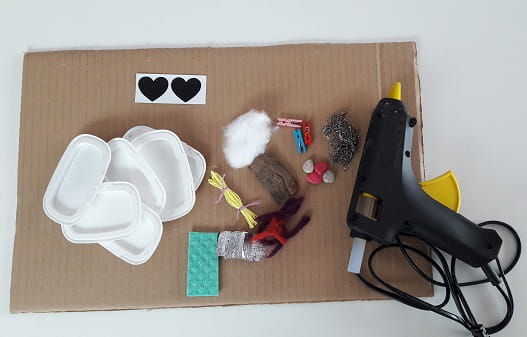
Materials needed for Sensory Board
- Cardboard
- Pencil
- Materials with various shapes and textures
- Glue gun
- Wet tissue lids
- Optional decorations, we used stickers
Instructions on how to make Sensory Board
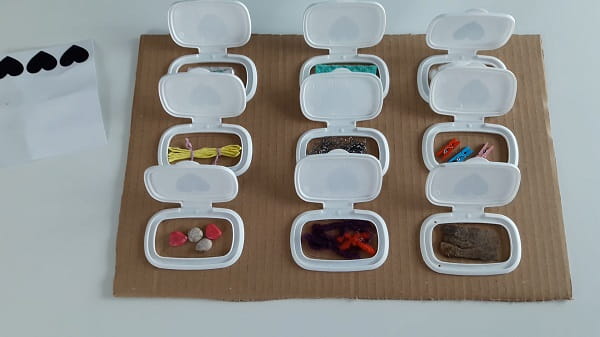
Now on to business. Our child is currently very interested in opening and closing lids so we decided to include that in our sensory board. Below the lids, we glued some interesting textures, such as stones, tree bark, yarn…
For step by step instructions on how to make this sensory board, watch the video on the beginning of the article or continue reading.
- Get the piece of cardboard (you can use other materials such as wood) that will serve as a base for the board
- Mark the area in which you’ll glue the materials
- Glue the materials you prepared in designated areas (we used stones, yarn, aluminum foil, tree bark, clothespins, sponge, etc., but feel free to use any materials)
- Now glue the lids on top of the materials. You can use wet tissues lids which are easy to open and close again.
- The sensory board is done! Decorate it as you please, we used some heart shaped stickers.
- Unleash the little explorers and take a well-deserved break! 🙂
Positive effects of Sensory Board
- Supports discovery and exploration
- Interesting textures provide plenty of tactile stimuli
- Fine motor skills development with opening and closing lids
- Learning about cause and effect
- Different shapes and colors serve as a great visual stimulus
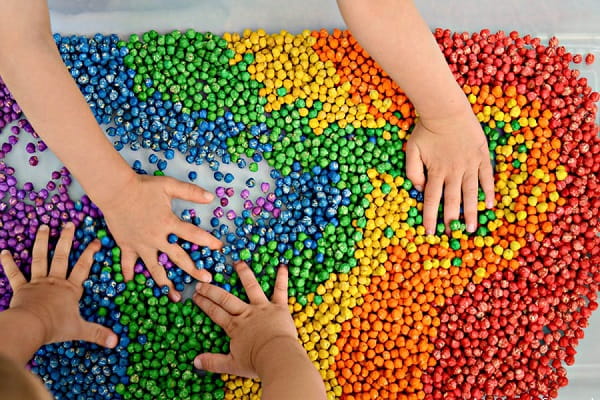
We hope you had some fun in making this awesome didactic toy and that your child will enjoy using it even more. Explore more of the sensory activities, we already mentioned the Sensory bottle and Sensory bag, but we also have Sensory sticks which are great for traveling and Rainbow colored rice for a plethora of sensory fun.
If you’re searching for some great STEM Activities for Kids and Child development tips, you’re in the right place! Check the Categories below to find the right activity for you.

STEM Science
Videos, guides and explanations about STEM Science in a step-by-step way with materials you probably already have at your home. Find new Science ideas.
Read more
STEM Technology
Videos, guides and explanations about STEM Technology in a step-by-step way with materials you probably already have at your home. Find new Technology ideas.
Read more
STEM Engineering
Videos, guides and explanations about STEM Engineering in a step-by-step way with materials you probably already have at your home. New Engineering ideas!
Read more
STEM Math
Videos, guides and explanations about STEM Math in a step-by-step way with materials you probably already have at your home. Find new Mathematics ideas.
Read more
Psychology
Find out all about development psychology topics that you always wanted to know. Here are articles from child psychology and development psychology overall.
Read more
First year of Child’s Life
Following a Child’s development every month from its birth. Personal experiences and tips on how to cope with challenges that you will face in parenting.
Read more
One thought on “How to make Sensory Board”